How to extract a tooth at home? Whoa, that’s a serious decision. DIY tooth extractions are super risky, fam. You gotta know the potential dangers before you even think about pulling a tooth yourself. From infections to nerve damage, the complications can be major.
Plus, a professional extraction is way safer and more effective, so it’s always better to see a dentist, you know?
This guide explores the risks and dangers of attempting home tooth extractions, outlining the potential complications and situations where professional dental care is absolutely necessary. We’ll cover everything from identifying the need for extraction to post-extraction care, and hopefully, help you make an informed decision. But seriously, don’t try this at home unless you’re a pro.
Introduction to Tooth Extraction at Home
Yo, homies, lemme drop some truth bombs about pulling teeth at home. It’s a seriously bad idea, like, super, duper bad. Think about it – you’re messing with something super delicate, your mouth. Trying to yank a tooth out yourself is a recipe for disaster, and we’re not talking about just a little pain here.Pulling a tooth yourself could lead to some major problems, from infection to nerve damage.
Plus, you ain’t got the tools or the expertise a real dentist has. So, let’s be clear – professional dental care is the only way to go when it comes to tooth extractions. And if you’re thinking about doing it yourself, just chill and listen up, because this ain’t a drill.
Risks and Dangers of Home Tooth Extraction
Trying to pull a tooth at home is a major gamble. You’re putting yourself at risk for some serious complications, and it’s not worth the headache. Improper technique can cause excessive bleeding, infection, and damage to surrounding tissues and nerves. Think about the pain, the potential for long-term health issues, and the cost of fixing any mistakes you make.
Not cool, right?
Potential Complications from Improper Extraction Techniques
Improper extraction techniques can lead to a whole host of problems. You could accidentally damage adjacent teeth, creating problems with alignment and function. Plus, there’s the risk of nerve damage, which can result in long-lasting pain and even numbness. A simple extraction gone wrong can snowball into a major dental nightmare, and you definitely don’t want that.
Situations Requiring Professional Dental Extraction
There are situations where pulling a tooth at home is just plain crazy. If the tooth is impacted, meaning it’s stuck beneath the gum line, or if there’s a serious infection, a professional is a must. Wisdom teeth removal is another prime example. These things need to be done by a pro with the right tools and experience.
Also, if the tooth is fractured or broken in a complex way, it’s crucial to go to a dentist for the extraction.
Importance of Professional Dental Care
Going to a dentist for tooth extraction is a no-brainer. They’ve got the training, the experience, and the tools to do the job safely and effectively. They can assess the situation, use proper techniques, and manage any potential complications. Plus, they can help you recover and ensure long-term oral health. It’s way better than trying to be your own dentist.
Comparison of Home vs. Professional Extraction Methods, How to extract a tooth at home
| Feature | Home Extraction | Professional Extraction |
|---|---|---|
| Tools | Tweezers, pliers (often inappropriate and unsafe) | Specialized dental tools, instruments, and anesthesia |
| Safety | High risk of injury to surrounding tissues, nerves, and teeth. Potentially significant bleeding. | Minimized risk of injury with trained personnel and sterilization protocols. |
| Infection Risk | Extremely high due to lack of sterilization and proper technique. | Low risk due to sterilization procedures and expert technique. |
| Pain Management | No proper pain management available. Potential for severe pain. | Anesthesia options to minimize pain and discomfort. |
| Post-Extraction Care | Limited knowledge on aftercare leading to complications. | Expert guidance and instructions for proper post-operative care. |
This table shows a clear difference in the safety and effectiveness of home versus professional extractions. Professional dentists have the right equipment and expertise to handle even the trickiest extractions safely.
Identifying the Need for Extraction
Yo, homies, tryna pull a tooth at home? First things first, you gotta knowwhy* you need to pull it out in the first place. It’s not just about a loose tooth, fam. There’s a whole lot more to it than that. We’re gonna break down the signs that say, “Yo, this tooth needs to go!”Identifying the need for a tooth extraction isn’t a DIY job for everyone.
It’s crucial to get professional advice, and a dentist is the best person to diagnose the problem and decide if extraction is necessary. This info is just for educational purposes, not a DIY guide.
Signs a Tooth Needs Extracting
Knowing when a tooth needs a serious intervention is crucial. A few telltale signs include severe pain, infection, or damage that can’t be fixed. This isn’t about playing dentist; this is about recognizing when you need to call in the pros.
- Severe, Persistent Pain: This ain’t a toothache that goes away with some ibuprofen. If the pain is relentless, throbbing, or accompanied by swelling, it’s a major red flag. Think about a tooth that’s giving you fits all day long. That’s a serious issue.
- Advanced Decay: Cavities that are deep or widespread and can’t be repaired are a strong indicator that a tooth might need to be pulled. Think about a tooth that’s been rotting from the inside out.
- Trauma and Fractures: A chipped or cracked tooth that’s causing pain or sensitivity, or a tooth knocked out of alignment can signal the need for extraction. Think about a tooth that’s been smashed or broken, that’s a clear indication.
- Abscesses: A pocket of pus around a tooth is a sign of a serious infection. This needs immediate attention, and extraction might be the only way to clear it up. Imagine a boil that won’t go away; that’s a similar concept.
Dental X-Rays in Extraction Decisions
Dental X-rays are essential tools for a dentist to make informed decisions about a tooth’s condition. They provide a clear view of the root structure, bone surrounding the tooth, and any hidden issues. This is not just a picture, fam; it’s a critical tool.
- Visualizing the Full Picture: X-rays show the complete anatomy of the tooth, including the roots and the bone structure around it. This helps in determining the extent of damage and whether it’s severe enough to warrant extraction.
- Detecting Hidden Issues: X-rays can reveal hidden problems like impacted teeth, cysts, or tumors that might not be visible during a regular exam. These can cause major issues and need immediate attention.
- Evaluating Treatment Options: X-rays help the dentist evaluate the best course of action, including the possibility of root canal therapy or extraction. This is critical for determining the best approach.
Factors to Consider Before Home Extraction
Before you even think about pulling a tooth yourself, consider these factors. Pulling a tooth at home can be a bad idea.
- Risk of Infection: Improper extraction can lead to serious infections. This is something you don’t want to mess with. Your health is more important than saving a few bucks.
- Damage to Surrounding Tissues: A DIY extraction could damage the surrounding gums, nerves, or bone, leading to more serious problems. Think about the damage you can do to your mouth.
- Potential for Long-Term Issues: A botched home extraction can lead to chronic pain, jaw problems, or even the need for more extensive dental work in the future. These issues are not worth the risk.
Professional vs. Home Extraction
This table summarizes the key differences between professional and home extraction:
| Tooth Condition | Symptoms | Recommended Action (Professional vs. Home) |
|---|---|---|
| Severe decay, fractured root | Severe pain, sensitivity | Professional Extraction |
| Loose, infected tooth | Pus around tooth, throbbing pain | Professional Extraction |
| Impacted wisdom tooth | Pain, swelling, difficulty chewing | Professional Extraction |
| Minorly chipped or cracked surface | Mild pain, sensitivity | Professional Consultation (likely restorative treatment) |
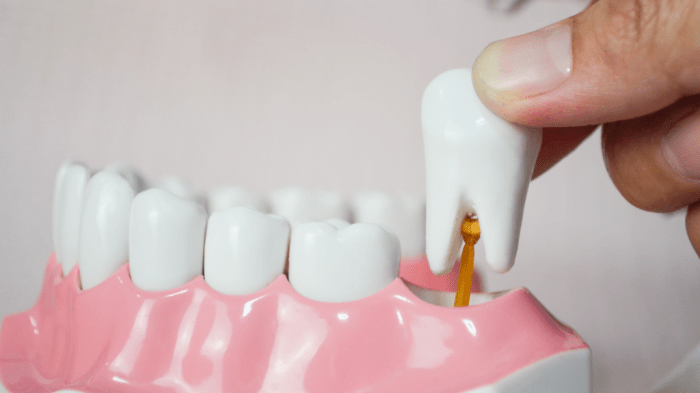
Assessing the Tooth to be Removed
Yo, homies, getting ready to yank a tooth at home? Crucial first step is assessing the situation. This ain’t no TikTok challenge, this is real life dental work. We gotta be straight up with the tooth’s condition and position. This ain’t a game, fam.Assessing the tooth’s condition and position is key to a smooth extraction.
Understanding the tooth’s stability and surrounding structures is vital to avoiding potential complications. We’re talkin’ about preventing pain, infection, and potential nerve damage. Let’s dive into the nitty-gritty of tooth assessment.
Visual Inspection
Visual inspection is your first line of defense. Using a mirror, you can clearly see the tooth’s position and condition. Look for signs of damage, decay, or infection. Look closely for any surrounding swelling, redness, or tenderness. Also, look for signs of gum disease.
If you see anything concerning, it’s best to seek professional help. This isn’t a DIY operation for complex situations.
Probing the Tooth
Using a dental probe (a small, pointy tool) gently probe the area around the tooth. Feel for any looseness or mobility. The probe helps you gauge the tooth’s stability. A loose tooth is more likely to come out with less force. A tightly bound tooth requires more care and skill.
Don’t force the probe.
Determining Tooth Position and Stability
Proper assessment of the tooth’s position and stability is paramount. Determine the angle of the tooth relative to the gums and jawbone. Use the mirror and your fingers to assess the tooth’s position. Is it angled? Straight up and down?
Assess the tooth’s mobility with gentle pressure. Is it slightly loose, or deeply rooted? Knowing the tooth’s position and stability will influence the technique used for extraction.
Loose Enough for Extraction?
A loose tooth is generally easier to extract. If you can easily rock the tooth back and forth, it’s probably loose enough. However, extreme looseness isn’t always a good thing. A tooth that’s too loose might be unstable and potentially damage surrounding structures. The sweet spot is a tooth that’s loose enough to extract without too much force but still stable enough not to be dislodged easily.
Potential Complications
Extracting a tooth at home, even a loose one, carries risks. Complications can arise depending on the tooth’s position, surrounding structures, and the individual’s oral health. Possible complications include:
- Damage to adjacent teeth.
- Nerve damage.
- Infection in the extraction site.
- Dry socket (alveolar osteitis).
- Excessive bleeding.
These potential complications highlight the importance of careful assessment and professional guidance. This is not a DIY project if you’re unsure.
Tooth Types and Extraction Challenges
Different teeth pose different extraction challenges. A wisdom tooth, for example, is often impacted and requires more specialized care. A front tooth is generally easier to extract than a molar, which often has more surrounding roots. Here’s a quick look:
| Tooth Type | Extraction Challenges |
|---|---|
| Wisdom Teeth | Often impacted, require more precise extraction, higher risk of complications |
| Front Teeth | Generally easier to extract, less risk of damage to surrounding structures |
| Molars | More complex roots, higher risk of damage to nerves and surrounding bone |
This table provides a general overview. Always assess the specific tooth in question before attempting extraction. Consult a dentist for advice on specific situations. If you’re feeling hesitant, a dentist is the best option.
Preparing for Home Extraction

Yo, fam, lemme drop some serious knowledge about gettin’ ready for a DIY tooth pull. This ain’t a game, so listen up. We’re talkin’ safety first, cleanin’ everything down, and gatherin’ the right tools to make this a smooth operation. This ain’t no Hollywood movie, so let’s keep it real and avoid any major dental drama.This ain’t a walk in the park, and you gotta be prepared.
We’re talkin’ about proper sterilization, essential supplies, and making sure you’ve got a clean workspace. Think of this like a surgery, but at home. You gotta be precise, and safety is key. Your mouth is a delicate environment, so let’s get this right.
Safety Precautions
Safety is the first rule, and it’s non-negotiable. This ain’t a freestyle rap battle; you’re dealin’ with your own body. Always prioritize your well-being and safety. Never attempt a home extraction if you’re feeling unwell or if you have any underlying health conditions. If you have doubts, consult a dentist.
If you’re not feeling confident, just don’t do it. Your health is worth more than a few minutes of DIY dentistry.
Sterilization Techniques and Equipment
Sterilization is critical for preventing infection. You gotta use proper methods to kill any germs and bacteria that could lead to serious complications. Boiling water is a solid option for tools like tweezers, but double-check instructions for specific instruments. If you’re unsure about sterilization, always err on the side of caution and visit a dentist. It’s better to be safe than sorry.
Essential Supplies
You need the right tools for the job, so let’s make a list:
- Sterilized tweezers or extraction forceps
- Sterilized pliers (if needed)
- Sterile gauze pads
- Antiseptic solution (like diluted hydrogen peroxide)
- Sterile cotton balls or swabs
- Gloves (latex or nitrile)
- Pain relievers (over-the-counter medication)
- Mouthwash (if you have any)
- Clean towels or a clean cloth to protect your work area.
Having the right gear is key for a smooth operation. Make sure everything is sterilized before you start.
Nah, ngeluarin gigi sendiri di rumah tuh bahaya banget, bro. Kayaknya mending langsung ke dokter gigi aja. Lagian, biaya operasi penggantian sendi panggul dengan asuransi, itu kan mahal banget, how much is a hip replacement with insurance. Mending gigi sakit ditahan dulu, daripada harus ngeluarin duit banyak buat operasi sendi panggul. Udah gitu, kalau salah cara ngeluarin gigi sendiri, bisa tambah sakit lagi, lho! Lebih baik konsultasi sama ahlinya aja.
Disinfecting the Extraction Area and Surrounding Tissues
Before you even think about grabbing that tooth, you gotta prep the area. Thoroughly rinse your mouth with antiseptic mouthwash. Then, gently wipe the affected area with a sterile gauze pad soaked in antiseptic solution. This helps eliminate any potential bacteria. It’s like a scrub-down for your mouth.
Preparing the Extraction Area and Tools
First, you gotta get your hands on the tools and disinfect them. Sterilize your instruments using boiling water or an appropriate method. Make sure your work area is clean and disinfected. You need to create a sterile environment to minimize the risk of infection. After prepping the tools, gather your gauze pads, cotton balls, and any other necessary supplies.
Now you’re ready to take on the tooth.
Post-Extraction Care: How To Extract A Tooth At Home
Yo, fam, getting a tooth pulled at home is a serious move. It’s not a walk in the park, and aftercare is CRUCIAL. This ain’t no game, so listen up. Ignoring post-op care can lead to serious problems, like infections and even more trips to the dentist. We’re breaking down how to handle the pain, swelling, bleeding, and potential infection, so you can chill and heal up right.
Importance of Aftercare
Proper post-extraction care minimizes discomfort, promotes healing, and prevents complications. Ignoring aftercare can result in prolonged pain, swelling, infection, and potential damage to the surrounding tissues. Think of it like this: taking care of your body after a surgery is just as important as the surgery itself. It’s about giving your body the best chance to recover smoothly.
Managing Pain and Swelling
Pain and swelling are common after a tooth extraction. Over-the-counter pain relievers, like ibuprofen or acetaminophen, are your first line of defense. Apply a cold compress to the area for 15-20 minutes at a time, several times a day, to reduce swelling. Elevate your head while resting to help minimize swelling. Ice is your best friend here.
Keep that cold compress on, and you’ll be feeling better in no time.
Foods and Drinks to Avoid
To prevent disruption of the blood clot and promote healing, steer clear of hard, crunchy, or spicy foods for a few days after extraction. Think about it like this, you wouldn’t want to mess with a fresh wound. Avoid straws and anything that could disturb the blood clot. Drinking through a straw can dislodge the clot, and that’s a big no-no.
Also, avoid anything too hot, as this can irritate the area. Stick to soft foods, like yogurt, mashed potatoes, and soups.
Controlling Bleeding
Bleeding after an extraction is normal. Apply gentle, firm pressure to the area with a clean gauze pad for 30 minutes. If bleeding continues, add another gauze pad and apply more pressure. Don’t remove the gauze pad until bleeding stops, even if it seems to slow down. You’re building a strong clot, so don’t yank it off.
If bleeding persists for more than an hour, contact your dentist or a medical professional immediately.
Ngomong-ngomong soal ngeluarin gigi sendiri, jangan coba-coba deh! Kayaknya di little world international food market tuh, ada banyak makanan enak yang bisa bikin kita seneng, daripada ribet-ribet ngeluarin gigi sendiri. Mendingan cari dokter gigi aja, biar aman dan hasilnya bagus. Kan nggak mau gigi kita jadi kayak kue lapis yang berantakan, ya?
Post-Extraction Management Chart
| Issue | Action | Frequency |
|---|---|---|
| Pain | Take over-the-counter pain relievers (ibuprofen/acetaminophen). Apply cold compress. | As needed, but not more than every 4 hours. |
| Bleeding | Apply firm, gentle pressure with gauze for 30 minutes. Add gauze if needed. | Continue until bleeding stops. If bleeding continues for over an hour, contact a professional. |
| Infection | Monitor for signs like increased pain, swelling, fever, or pus. If any of these occur, seek professional help immediately. | Continuously, and contact a professional if signs appear. |
Potential Complications and Prevention
Yo, homies, tryna pull a tooth at home? It’s a risky move, fam. Think of it like a DIY surgery. Things can go sideways quick, so knowing the potential pitfalls is crucial. This ain’t a tutorial for a viral TikTok dance; this is about your chompers, so listen up.
Potential Complications of Home Tooth Extraction
Home extractions, while tempting, can lead to a whole mess of problems. Ignoring the risks is a major no-no. Your mouth’s a delicate ecosystem, and messing with it without the right tools and expertise can cause serious issues.
List of Potential Complications
These aren’t just theoretical worries; they’re real scenarios that can happen if you’re not careful. Listen closely to the potential hazards:
- Infection: Bacteria love a wound, and a tooth extraction is a prime target. If you don’t clean the area properly or don’t follow post-op instructions, infection can set in, causing pain, swelling, and even fever. Imagine a throbbing abscess, that’s no fun. Proper cleaning and antibiotics can get rid of it, but you might need a dentist to fix the damage.
- Nerve Damage: Teeth are connected to nerves, and messing with them can cause serious problems. If you accidentally injure a nerve during the extraction, you could experience persistent numbness, tingling, or even pain in the surrounding area. Think about how annoying a toothache is; imagine a nerve injury that lasts forever. Professional dentists have the right tools and expertise to avoid these issues.
- Bleeding: Extractions are bound to cause some bleeding, but excessive bleeding can be a problem. It can lead to dizziness, lightheadedness, and in severe cases, even a blood transfusion. Imagine trying to stop a flood with a paper towel. It ain’t gonna work. A dentist can handle it better.
- Dry Socket: A dry socket is a painful condition that occurs when the blood clot that forms after extraction dislodges or dissolves. This exposes the underlying bone and nerves, resulting in intense throbbing pain. Think of a wound that keeps getting worse. It requires professional treatment to heal properly.
- Fractured Jaw: In very rare cases, using the wrong tools or applying excessive force during extraction can lead to a fractured jaw. Imagine a broken jaw, it’s a severe injury that needs immediate medical attention. It’s a huge risk to avoid.
Illustrative Examples of Complications
Let’s look at some real-world examples:
- Example 1 (Infection): A teenager tried to extract a severely impacted wisdom tooth at home. He didn’t clean the area properly and didn’t follow post-extraction instructions. The infection spread to his jaw, requiring a trip to the emergency room and several rounds of antibiotics. Moral of the story? Trust the pros.
- Example 2 (Nerve Damage): A young adult attempting a home extraction of a decayed molar inadvertently damaged the nearby nerve. This resulted in persistent numbness and tingling in their lower lip. They had to see a specialist to manage the nerve damage.
Prevention Strategies
So, how do you avoid these problems? Here’s the deal:
| Potential Complications | Recommended Actions |
|---|---|
| Infection | Thorough cleaning of the extraction site, following prescribed antibiotics, and maintaining good oral hygiene. |
| Nerve Damage | Avoid attempting home extractions, especially on sensitive teeth, and seek professional help. |
| Bleeding | Applying firm, gentle pressure to the extraction site, and following instructions on managing bleeding. |
| Dry Socket | Following the dentist’s instructions on post-extraction care and avoiding irritating the extraction site. |
| Fractured Jaw | Never attempt a home extraction. Seek professional dental care immediately. |
When to Seek Professional Help
Yo, fam, home tooth extractions are a risky business. While it might seem like a DIY solution, things can go south fast. Knowing when to call in the pros is key to avoiding major dental drama.
Situations Requiring Immediate Professional Intervention
Sometimes, a home extraction just ain’t the move. There are clear signs that professional help is absolutely essential. These aren’t situations for a DIY extraction attempt. You gotta prioritize your oral health.
- Severe bleeding: If the bleeding won’t stop after 30 minutes of firm pressure, that’s a major red flag. A professional can apply specialized techniques to control the bleeding and prevent complications. Imagine a constant, dripping faucet—that’s not good. Professional intervention is needed.
- Severe pain that won’t subside: A throbbing ache that won’t ease up with over-the-counter pain relievers is a sign that something’s seriously wrong. It could be an infection, a nerve injury, or something else that needs a dentist’s expertise. You need a real pro to fix that pain.
- Swelling and/or bruising: If your face starts to swell up like a balloon or you get a massive bruise, it’s a strong indication that you need immediate professional help. This could be a sign of an infection or other issues that need professional treatment.
- Signs of infection: Look for pus, a bad taste in your mouth, fever, or a general feeling of sickness. These are major infection signals, and you need a dentist’s quick action. Infections can spread to other parts of your body, and they’re no joke.
- Damage to surrounding teeth: If you accidentally damage any neighboring teeth during the extraction, professional care is a must. They can assess the damage and provide the necessary repair.
- Difficulty breathing or swallowing: This is a serious situation that requires immediate professional intervention. If you have trouble breathing or swallowing after a home extraction, get to a dentist ASAP. Don’t mess around with this; it’s a medical emergency.
Importance of Seeking Professional Help for Severe Complications
Ignoring severe complications after a home extraction attempt can lead to serious consequences. Ignoring infection, for example, can result in more severe infections, and even lead to spreading the infection to other areas of the body. It’s a risk you shouldn’t take. The pros have the tools and knowledge to manage these situations safely and effectively. Don’t be a hero when you need a pro’s skills.
Steps to Take if Complications Arise During or After a Home Extraction
If something goes wrong during or after a home extraction, your first move is to contact your dentist or a nearby emergency dental clinic. Don’t delay. Immediately seek professional help if you experience any of the symptoms mentioned above.
- Contact your dentist or emergency dental clinic immediately.
- Describe the situation and any complications clearly and thoroughly.
- Follow the instructions given by the dental professional regarding next steps.
Table of Situations Requiring Professional Intervention
| Situation | Action |
|---|---|
| Severe bleeding (won’t stop after 30 minutes) | Seek immediate professional help |
| Severe, persistent pain | Seek immediate professional help |
| Significant swelling or bruising | Seek immediate professional help |
| Signs of infection (pus, fever, etc.) | Seek immediate professional help |
| Damage to surrounding teeth | Seek immediate professional help |
| Difficulty breathing or swallowing | Seek immediate professional help |
Ending Remarks
So, there you have it—a deep dive into the world of home tooth extractions. While this guide provides information, remember, DIY tooth removal is incredibly dangerous. Always prioritize professional dental care. If you’re facing a tooth problem, see a dentist ASAP. Your oral health is too important to mess with.
Popular Questions
Q: What are the common symptoms that suggest a tooth needs extraction?
A: Severe pain, persistent swelling, broken or fractured teeth, loose teeth, and infections are some of the common symptoms. Also, a dentist can diagnose this after a thorough check-up and X-rays.
Q: What are the essential supplies needed for a home extraction?
A: Sterile instruments, antiseptic solution, gauze pads, and a clean, well-lit area. Definitely avoid anything that could introduce bacteria.
Q: What are the risks of a DIY tooth extraction?
A: Possible nerve damage, dry socket, infection, and bleeding complications are all major risks of DIY tooth removal. It’s super important to consider the potential dangers before you even think about doing this.
Q: When should I seek professional help after a home extraction attempt?
A: If you experience excessive bleeding, severe pain, swelling, or signs of infection, seek professional dental help immediately. Don’t delay!
