Nails that don’t damage walls are crucial for maintaining wall integrity. This guide dives into the specifics of selecting the right nails and employing proper installation techniques to prevent costly repairs and ensure a clean, professional finish. We’ll explore various nail types, installation methods, and alternatives to hanging items without harming the walls.
From choosing the appropriate nail size for different wall materials to mastering hammering techniques, this guide will empower you with the knowledge to avoid common pitfalls and achieve perfect results. Learn how to prepare walls effectively and discover alternatives to nailing, providing a comprehensive approach to wall-friendly hanging.
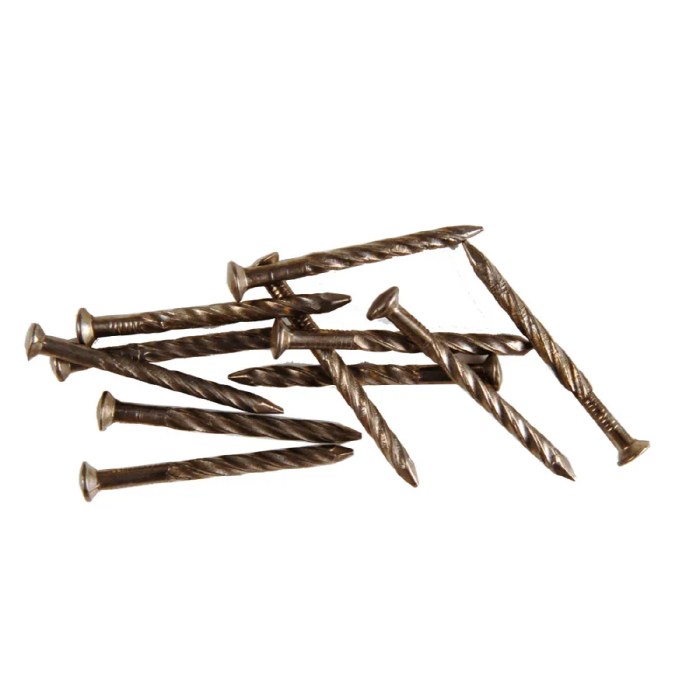
Types of Nails for Wall-Friendly Installation

Hey Bali babes! Nailed it! Choosing the right nail for your wall projects is key to avoiding those dreaded wall-damaging dents and dings. This guide breaks down the different nail types, sizes, and head styles, so you can confidently install without worry.Understanding nail types is crucial for preventing wall damage during installation. Different nails are designed for specific tasks and materials, and choosing the wrong one can lead to problems like splitting, cracking, or even nail-head pops.
Let’s dive into the details!
Nail Types for Interior Walls
Various nail types are available, each with unique characteristics. Understanding these characteristics will help you choose the right nail for the job. Finishing nails, framing nails, and roofing nails all have different strengths and weaknesses. This knowledge empowers you to choose wisely, preventing costly mistakes.
- Finishing Nails: These are small, slender nails, typically used for decorative purposes or light-duty fastening. Their small size and smooth head are less likely to cause damage to delicate surfaces. Their fine shape and small heads mean less visual impact, making them great for finishing touches on interior projects. Perfect for attaching picture frames or hanging light objects.
- Framing Nails: These nails are sturdy and larger than finishing nails, ideal for heavier-duty applications, like attaching wood to studs. They’re frequently used in framing, hence the name. The robust construction of framing nails makes them suitable for holding heavy objects. However, the larger head can create more potential for wall damage if not driven correctly.
- Roofing Nails: These are usually thicker and longer than framing nails. Their sturdiness is designed to withstand the weather, making them unsuitable for most interior wall applications. Their strength and durability make them perfect for exterior projects but are not recommended for interior walls.
Nail Size and Head Type
The size and head type of a nail significantly influence its impact on the wall. A nail that’s too large for the wall material can cause damage, while a nail with a poorly shaped head can lead to issues.
- Nail Size: The diameter and length of a nail are critical. A nail that’s too long can go through the wall material and damage the drywall or plaster. Likewise, a nail that’s too short won’t hold the item securely. Using the correct size ensures a secure and clean installation.
- Head Type: The shape of the nail head plays a crucial role in minimizing wall damage. A smooth, countersunk head is less likely to cause dents or gouges than a protruding head. Smooth, countersunk heads create a more seamless finish, while protruding heads can leave noticeable marks.
Examples of Wall-Friendly Nails
Choosing the right nail type and size for your wall material is crucial. Drywall, for instance, requires a smaller, more delicate nail than plaster.
- Finishing nails, especially those with a countersunk head, are often a good choice for drywall and plaster, as they are less likely to damage the surface. Using the right size ensures the nail doesn’t go through the wall material, preventing damage and ensuring a clean installation.
- Small-diameter framing nails with a countersunk head can be suitable for certain light-duty framing tasks, but larger framing nails are best avoided.
Nail Type Comparison Table
This table summarizes the key characteristics of different nail types, helping you choose the best option for your project.
| Type | Material | Head Shape | Use | Wall Impact Potential |
|---|---|---|---|---|
| Finishing Nail | Steel | Smooth, countersunk | Light-duty fastening, picture frames, decorative items | Low |
| Framing Nail | Steel | Smooth, countersunk (or round) | Heavy-duty fastening, attaching wood to studs | Medium (larger sizes, incorrect use) |
| Roofing Nail | Steel | Round | Exterior fastening, heavy-duty | High (for interior use) |
Installation Techniques to Minimize Damage
Wanna keep your walls looking fresh and avoid those unsightly nail holes? Bali-style chic demands flawless finishes, and these techniques will help you nail it (pun intended!). Proper installation is key to achieving that stunning aesthetic without compromising the integrity of your walls.Mastering these methods ensures your decor pops without causing any structural stress on your abode. Think of it as a mindful approach to interior design – precision and care are paramount.
Proper Hammering Techniques
Effective hammering techniques are crucial for minimizing wall damage. Avoid aggressive swinging, as this can lead to splintering or cracking. Instead, use controlled, measured strikes. Focus on applying even pressure throughout the hammering process. Imagine the hammer as an extension of your hand, a precise tool for the job.
Accurate Nail Placement
Precise nail placement is essential for preventing damage and ensuring a neat finish. Before driving in any nail, take a moment to locate the studs within the wall. Using a stud finder will help you avoid hitting these hidden structural supports. If you can’t locate studs, a simple trick is to test with a nail at various points on the wall.
A slightly harder spot likely indicates a stud.
Using a Nail Set (or Hammer’s Nail Set)
A nail set or hammer’s nail set is a game-changer for damage-free installations. These tools gently countersink the nail head below the surface, creating a flush, almost invisible finish. This prevents the nail from protruding and causing unsightly holes, maintaining the wall’s pristine aesthetic. Think of it as a subtle touch-up, not a brute-force approach.
Step-by-Step Installation Procedure
For a flawless installation, follow these steps:
- Identify the nail placement and mark the spot on the wall using a pencil.
- If possible, use a stud finder to locate studs.
- Carefully position the nail in the marked spot.
- Lightly tap the nail head with the hammer’s claw to set it in place. This initial set helps to avoid further wall damage during the final hammering.
- Use a nail set or hammer’s nail set to countersink the nail head below the surface.
- Check the nail for a flush finish, making sure it’s even with the wall surface.
Precision and control are vital throughout this process. Think of each strike as a delicate dance, not a forceful impact.
Hammering Techniques Comparison
| Technique | Tools | Benefits | Potential Issues |
|---|---|---|---|
| Controlled Tapping | Hammer, Nail Set | Minimizes wall damage, creates a flush finish | Slower installation speed |
| Impact Hammering | Hammer | Can be effective on harder surfaces | High risk of wall damage, potentially creating larger holes |
| Nail Gun Installation | Nail Gun | Fast and efficient, reduces the risk of human error | Can damage softer walls, needs proper training |
This table Artikels different hammering techniques, emphasizing the tools used, and highlighting the advantages and potential drawbacks. Choosing the appropriate method is crucial for achieving the desired outcome without compromising the wall’s integrity.
Wall Preparation and Material Considerations
Nailed it! Getting your nails to stick without damaging the walls in Bali-style homes requires more than just the right nail. Prepping the wall is key, ensuring a flawless finish that looks as good as it performs. Understanding how different wall materials react to nails will prevent those pesky holes and keep your walls looking pristine.Proper wall preparation is a game-changer when it comes to seamless nail installations.
Knowing the wall’s composition and potential weak spots is crucial to preventing damage and ensuring long-lasting results. This means taking the time to identify studs, patch holes, and prime surfaces to create a sturdy and attractive foundation for your nails. Different materials react differently, so understanding these nuances will guarantee a perfect fit for your Bali-inspired decor.
Identifying Studs and Assessing Wall Integrity
Knowing where the studs are in your walls is like having a secret map to a strong and stable installation. These are the vertical beams within the walls, providing the structural support needed for nails to grip firmly. Using a stud finder, a simple tool for locating these hidden structural supports, can be a lifesaver. This tool allows you to place your nails in the strongest areas, reducing the risk of damage and ensuring your nails will last.Furthermore, visually inspecting the wall for any imperfections or weak spots is also important.
Look for cracks, loose plaster, or areas that seem less stable. These weak spots might become problematic points for nails, so it’s best to address them before nailing. Patches and reinforcements in these areas will ensure that your nails will stay put and your walls will stay intact.
Finding nails that won’t mar your walls is crucial for DIY projects. For a delicious side dish, check out this fantastic copycat recipe for Stouffer’s escalloped apples, which will have you reaching for the dessert apples. These special nails, designed for smooth, damage-free installations, are a game-changer for any home improvement project.
Wall Material Considerations, Nails that don’t damage walls
Different wall materials respond differently to nails. Understanding these nuances will help you choose the right nails and installation techniques for each type of wall.
- Drywall: Drywall is a common wall material, and it’s crucial to use nails designed for drywall. Avoid using nails that are too big or too thin for the drywall, as this can lead to the drywall cracking or splitting. Properly patching any holes in the drywall before nailing is essential. If a hole is too large, consider using drywall patch to ensure a strong and even surface.
- Plaster: Plaster walls require specialized nails and careful handling. Use nails specifically designed for plaster, ensuring the nail’s head is properly countersunk to avoid damage to the surface. Avoid hammering nails too hard, as this can cause the plaster to crack. Ensure the plaster is solid and properly attached to the wall before nailing.
- Wood Paneling: Wood paneling presents a different set of considerations. Use nails appropriate for the type of wood paneling. Ensure the nails are long enough to penetrate the paneling and reach the underlying support. Always pre-drill holes to prevent the wood from splitting. For example, using the correct nail size and type for the paneling can significantly impact the installation’s durability.
Preparing Surfaces for Optimal Nail Installation
Proper surface preparation is paramount for a smooth and lasting installation.
- Patching Holes: Any holes or imperfections in the wall should be addressed before nailing. Using drywall patching compound or plaster, depending on the wall material, to repair these imperfections will create a stable surface for your nails. A good patch job is like giving your nails a sturdy foundation.
- Priming Surfaces: Priming the wall before nailing helps to create a uniform surface and improves adhesion, ensuring that your nails grip the wall better. This step is particularly important for walls with uneven textures or previous paint jobs.
Examples of Improper Wall Preparation
Failing to prepare the wall properly can lead to various issues, from unsightly damage to weakened structural integrity.
- Missing Studs: Nailing into a spot without a stud can result in the wall cracking or bowing. Identifying studs and ensuring nails are placed in them is essential.
- Using Incorrect Nail Size: Using nails that are too big or too small for the wall material can cause damage. The wrong size nail can easily crack the wall or bend the nail, making it more likely to come loose.
- Ignoring Wall Imperfections: Failing to address cracks or loose areas in the wall before nailing can lead to uneven installations and increased chances of future damage. Addressing these issues before nailing will ensure the nails stay put.
Alternatives to Nails for Hanging Items
Spice up your Bali-inspired decor without damaging those precious walls! Say goodbye to nail holes and hello to a range of stylish and secure hanging solutions. These methods are perfect for renters, homeowners who prioritize wall preservation, and anyone looking for a touch of eco-friendly design.Hanging items without nails is a breeze, especially when you understand the different options available.
From super-strong adhesives to clever picture hanging systems, there’s a perfect method for every item and wall type.
Adhesive Hooks
Adhesive hooks are a fantastic option for lightweight items like plant pots, small shelves, and decorative accents. They offer a convenient and quick solution for temporary or permanent displays. Choosing the right hook is crucial, ensuring it’s appropriate for the weight of the item you’re hanging and the surface of your wall.
- Types of Adhesive Hooks: Different types of adhesive hooks are available, catering to various weight capacities and wall materials. Look for hooks specifically designed for painted walls, or those with extra-strong adhesive for heavier items. Consider the surface area of the hook’s adhesive backing, as this often influences the weight it can hold. Some are even made with special materials to be more resistant to moisture and humidity.
- Weight Capacity Considerations: Always check the weight capacity of the hook before hanging anything. Don’t overload the hook, as this can lead to failure and damage to the wall. Overestimating the weight capacity can result in damage. Test the adhesive’s strength before hanging a significant object. If in doubt, opt for a stronger hook.
- Wall Material Compatibility: Some adhesive hooks are specifically designed for certain wall materials. For example, some hooks are more suitable for smooth surfaces like painted walls or tiles, while others might be better for rougher surfaces like plaster or textured walls. Choose a hook that’s compatible with your wall material for optimal performance and long-lasting results.
Hanging Strips
Hanging strips are another great wall-friendly alternative to nails. They’re versatile, providing a clean and unobtrusive way to hang artwork, mirrors, and other decorative pieces. These strips are particularly useful for renter’s situations or when you want to maintain a seamless wall aesthetic.
- Versatility: Hanging strips are suitable for various wall types, from smooth to slightly textured surfaces. They are easily removable, making them ideal for temporary displays.
- Weight Capacity: Like adhesive hooks, the weight capacity of the hanging strip varies greatly. Ensure the strip is suitable for the weight of the item being hung, or risk damage.
- Installation: Proper application is essential for optimal adhesion and durability. Ensure the strip is applied correctly for a secure and lasting hold.
Picture Hanging Systems
Picture hanging systems offer a sophisticated and secure way to display artwork and photographs without damaging the walls. These systems usually involve specialized clips or brackets that attach to the wall, enabling you to easily change your artwork or pictures without damaging the wall.
- Versatility: Picture hanging systems allow for flexibility in arrangement and repositioning of pictures, without the need for repeated nail holes. These systems are perfect for homes where art is frequently rotated.
- Durability: These systems are designed to hold pictures securely and are often made of strong, durable materials that resist wear and tear. Their strength is crucial in resisting damage.
- Aesthetic Considerations: Picture hanging systems are often designed to be visually unobtrusive, blending seamlessly with the wall’s design. The clip or bracket can blend in seamlessly with the décor.
Comparing Nails vs. Alternatives
| Feature | Nails | Adhesive Hooks | Hanging Strips | Picture Hanging Systems |
|---|---|---|---|---|
| Wall Damage | High | Low | Low | Low |
| Installation Difficulty | Moderate | Easy | Easy | Moderate |
| Cost | Low | Moderate | Moderate | Moderate to High |
| Removable | Moderate (requires effort) | Easy | Easy | Easy |
| Longevity | Variable (depends on quality of nails and wall) | Variable (depends on hook quality and wall type) | Variable (depends on strip quality and weight) | High |
Choosing the right alternative depends on your needs and priorities. For lightweight items and temporary displays, adhesive hooks or hanging strips are excellent choices. For heavy items or a long-term solution, picture hanging systems are preferable.
Avoiding Common Nail-Related Wall Damage
Hey Bali babes! Perfecting your home decor shouldn’t involve a DIY disaster. Let’s dive into the dos and don’ts of nail-happy hanging, so your walls stay pristine and your projects look amazing. No more unsightly holes or cracks, just sleek, stylish installations.Proper nail selection and installation techniques are crucial for preserving your wall’s beauty. Choosing the right nail size and hammering method, plus prepping the wall correctly, can prevent costly and time-consuming repairs.
Understanding the common pitfalls and how to avoid them is key to achieving a flawless finish.
Finding nails that won’t mar your walls is crucial, especially when moving into a new place. Fortunately, modern construction materials and specialized fasteners are readily available. Considering the need for suitable housing options, many new apartments that accept section 8 vouchers in houston tx here offer a solution for those seeking affordable housing, ensuring a smooth transition with minimal wall damage.
This makes selecting the right nails a less daunting task when looking for suitable housing options.
Common Causes of Wall Damage
Selecting the incorrect nail size for the wall material and the hanging item is a frequent culprit. Using a nail that’s too small can bend or break, while one that’s too large can cause excessive tearing or splintering of the wall. A poor hammering technique, often resulting from rushing or using insufficient force, can also lead to damage.
Likewise, neglecting proper wall preparation before installing nails, especially on porous or uneven surfaces, can lead to cracks and uneven nail placement. Understanding these elements is essential for preventing future problems.
Impact of Improper Nail Size
Using the wrong nail size for the task and the wall material can significantly affect the integrity of your wall. A nail that’s too small for the item or the wall type can bend or break, leading to an unstable or incomplete hanging fixture. Conversely, a nail that’s too large might cause the wall to split or tear, creating unsightly holes or cracks.
Choosing the appropriate nail size is vital for a successful and aesthetically pleasing installation. A nail that is appropriately sized will securely hold the item without causing damage to the wall.
Impact of Poor Hammering Technique
Hammering a nail incorrectly can result in a range of wall damages. If you hammer too gently, the nail might not penetrate the wall deeply enough, leading to a loose or unstable hanging item. Conversely, hitting too hard can cause the nail to bend or create a large hole, or cause the nail to go through the wall entirely.
The proper hammering technique is critical for ensuring the nail is driven straight and at a proper depth without damaging the wall.
Impact of Improper Wall Preparation
Failing to adequately prepare the wall before installation can significantly impact the results. Uneven surfaces, or insufficient patching of holes or cracks, can cause the nail to move off-center or misalign, resulting in damage to the wall. Porous walls may absorb the nail’s force unevenly, leading to cracking or splintering. Thorough wall preparation is crucial for a secure and aesthetically pleasing installation.
Ensure the surface is clean, smooth, and level for a successful outcome.
Repairing Minor Wall Damage
Minor damage, such as small holes or cracks, can be effectively repaired. For small holes, use a wood filler that matches the wall’s color. Apply the filler, smooth it out, and allow it to dry completely. For cracks, use a patching compound appropriate for the wall material. Apply the compound, smooth it, and let it dry completely.
Finally, sand the repaired area to blend it seamlessly with the surrounding wall. These simple steps can restore the wall’s integrity and appearance.
Summary
In conclusion, achieving a seamless installation without damaging walls requires careful consideration of nail type, installation technique, and wall preparation. This guide has equipped you with the knowledge to select the perfect nails, employ effective hammering techniques, and explore alternatives for hanging items. By understanding these key aspects, you can ensure your projects are both aesthetically pleasing and respectful of your walls.
General Inquiries: Nails That Don’t Damage Walls
What types of nails are best for drywall?
Finishing nails with a small diameter are generally recommended for drywall. Avoid using framing nails as they are too large and risk causing damage.
How can I identify wall studs before nailing?
Using a stud finder is the most reliable method. Alternatively, tapping lightly on the wall can reveal the sound of a stud. Knowing where studs are located helps ensure nails are installed in sturdy areas, preventing wall damage.
What are some alternatives to using nails for hanging items?
Adhesive hooks, command strips, and picture hanging systems are excellent alternatives. These methods are often less damaging to walls and provide strong holding power for various items.
What are the common mistakes that cause nail damage to walls?
Using the wrong nail size for the wall material, improper hammering techniques, and insufficient wall preparation are frequent causes of damage. Using oversized nails, hitting studs too hard, and failing to patch holes are key mistakes to avoid.
